While researching possibilities to support the Dutch all-sky-cam project, I realized that the airspace of the Netherlands is already adequately covered by early enthusiasts using mostly 360 degrees fish-eye cameras.
I was still curious to explore techniques behind automated detection of meteors and all the problems that come along with this exciting citizen science activity. Richard Kacerek; the co-founder of the UKMON group and co-founder of eMeteorNews, invited me to write an article about my setup. I’m not an astronomer and I’m very new into this field but in this article, I would like to share information about my project.
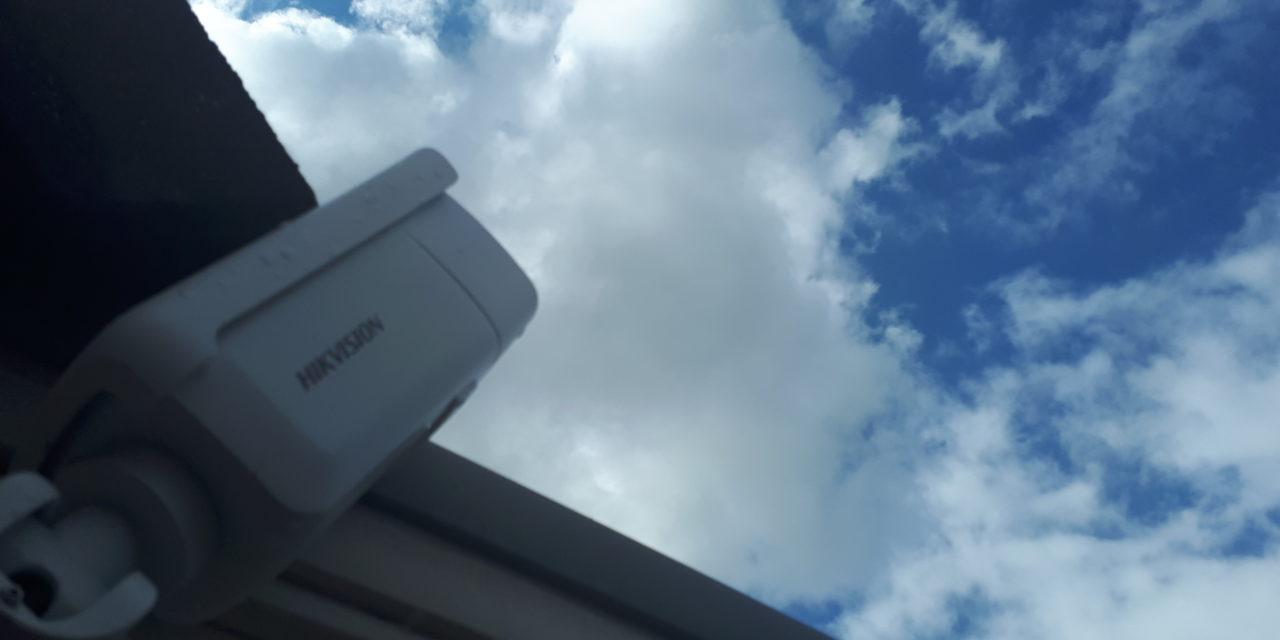
I had some reasonably good experience with the ‘new’ 4K IP based CCTV camera’s for other projects, so I wondered if those cameras could be suitable for the sky-cam setup. After a lot of sourcing, I bought a so-called bullet camera for outdoor use with a minimum shutter speed of one-third per second. The wired network camera can be powered over ‘Power over Ethernet’ (PoE) or 12VDC. In my setup, I use the PoE method; this way, you only have one cable from a PoE enabled network switch to the camera itself. Maximum distance for the cable is officially 100 meter, but with a quality PoE switch and CAT-6 cable, you might even extend this easily up-to 150 meters or further.
My first ‘CCTV’ sky-cam above the kitchen door

My first sky-cam above the kitchen door in Ulrum, Groningen, The Netherlands
Most IP-based CCTV cameras have an option to read the video-stream with RTSP (Real-Time Streaming Protocol) and sending interval images to a network-drive or (S)FTP server. As of now I only use the stills to detect possible meteors. To start with detecting I’ve configured the camera so that it will upload roughly every second an image to a local Debian SFTP server. As a ‘backup’ I’ve setup a 24 hour YouTube live-stream from the same camera, this video archive can be used to review the actual video of the detected meteors.
Using the Python programming language, the system triggers the detection algorithm on new image files in the ‘receive’ directory. The algorithm I use is based on the ‘Hough transform’ extraction technique. This method for meteor detection is described by C. Trayner, B.R. Haynes and N.J. Bailey in 1999. Hough-transform is ‘simply’ a technique to detect lines in images. This algorithm is implemented in OpenCV; an open-source ‘computer vision’ library written in C++ with bindings to multiple other programming languages, including Python used in my project.
In case the algorithm detects a line it will save a copy of the image in another folder for further analyzing, then the process will wait for the next image to be checked for ‘lines’ etc. etc. At night this works all quite perfect, but in the daytime, there may be a lot of false positives due to planes a sporadic bird or sharp-edged clouds.

One of my favourites so far; photographed on 9 April 2020, 22:51:39.815 UTC
Before the Hough-transform algorithm can do its ‘thing’ it is essential to do some preprocessing to speed things up and get more reliable results. When you take the meteor image above as an example the system will first convert the picture to grey-scale. From here, my program will apply a Gaussian blur over the image followed by a ‘Canny’ edge algorithm what will generate the following result:

Same image processed with the Canny-edge detection algorithm. As you can see there is still a lot of ‘noise’; this can be eliminated with a Gaussian blur effect before applying the Canny algorithm
After the Canny-edge algorithm, the Hough-transform algorithm can easily detect any possible lines and will return the position of each detected line for further processing.
A little bit basic Python 3 code to get the same result:
#!/usr/bin/env python3
import cv2 as cv,numpy as np

# Open a image and save the result in the variable 'image':
image = cv.imread('./your-image.jpg')

# Make a gray-scale copy and save the result in the variable 'gray'
gray = cv.cvtColor(image, cv.COLOR_BGR2GRAY)

# Apply blur and save the result in the variable 'blur'
blur = cv.GaussianBlur(gray, (5,5), 0)

# Apply the Canny edge algorithm
canny = cv.Canny(blur, 100, 200, 3)

# Save the result as 'canny.jpg'
cv2.imwrite(‘./canny.jpg’,canny)
For this code to run you need to have OpenCV and Numpy installed. This can be easily done on a Debian based machine with ‘apt install python3-opencv’.
To check if an image has possible lines you can simply add the following code at the end:
# The Hough-transform algo:
meteors = cv.HoughLinesP(canny, 1, np.pi/180, 25, minLineLength=50, maxLineGap=5)

if meteors is not None:
  print('I found a possible meteor')
else:
  print(':( Maybe next time better')
This small little script will now detect possible lines on an image and can be used to build your detection system. When you are not really into programming you may take a look on my web-based meteor detection algorithm environment; here you can adjust settings to see the effect of the algorithms on previous detected meteors.
Every morning I will check the results, remove any false positives and further process the images to merge nearby lines, calculate line length, line angles and so on. After this, the system populates a database with the results and publish it on my website.
As of now, I’m working on linking ADS-B data into my detection process to eliminate false positives by daytime planes. ADS-B is standard for radio signals sent out by most aeroplanes with flight information including their real-time GPS location. Those signals can be easily detected with a USB dongle and an external antenna. Knowing the location and detection window of your camera this can help you to automate the adjustment of algorithm parameters in the case of a nearby aeroplane.
Between 30 March 2020 and 5 May 2020, my system has detected 98 individual meteors. In a few cases, it made multiple images of the same meteor. With post-processing you can do a lot of interesting things like creating cinema-graph’s, generating statistics etc. I found out that a set of verified meteor images can be valuable to adjust my algorithms further and possibly use it to train machine-learning or ai systems.
The cost break down for my one camera setup is as follows:
– 5-port PoE network switch € 60,00
– 8MP CCTV weatherproof IP camera € 264,00
– Network cable € 20,00
Besides this you need a computer to store and process the images, I got mine; a 4th generation i5 from the local Goodwill for € 100 excluding peripherals. With one computer and the 5-port PoE switch I use I can still add up-to 4 more camera’s to further expand my sky coverage. Before I add more camera’s I want to work more on eliminating false positives, further automating processing and website infrastructure so that handling much more images won’t be a problem.
When you like to see more of my detection’s, including the detection algorithm environment, some cinema-graphs of single meteors and statistics of my system check out my website https://d64.nl/en/
Hoping for more clear skies 🙂

